Flow 1 — Create a Complete Event
What this flow covers
Section titled “What this flow covers”Follow these steps to go from zero to a fully configured event in MooveTeam CMS. This flow connects every event configuration tab into a single narrative: create the event, set its options, add teams, build challenges, define routes, and verify the setup before going live.
Prerequisites
Section titled “Prerequisites”- A MooveTeam CMS account with Admin or Agency role
- At least one company account associated with your user
- Challenge content prepared (questions, photos, GPS coordinates)
Step-by-step
Section titled “Step-by-step”Step 1 — Create the event
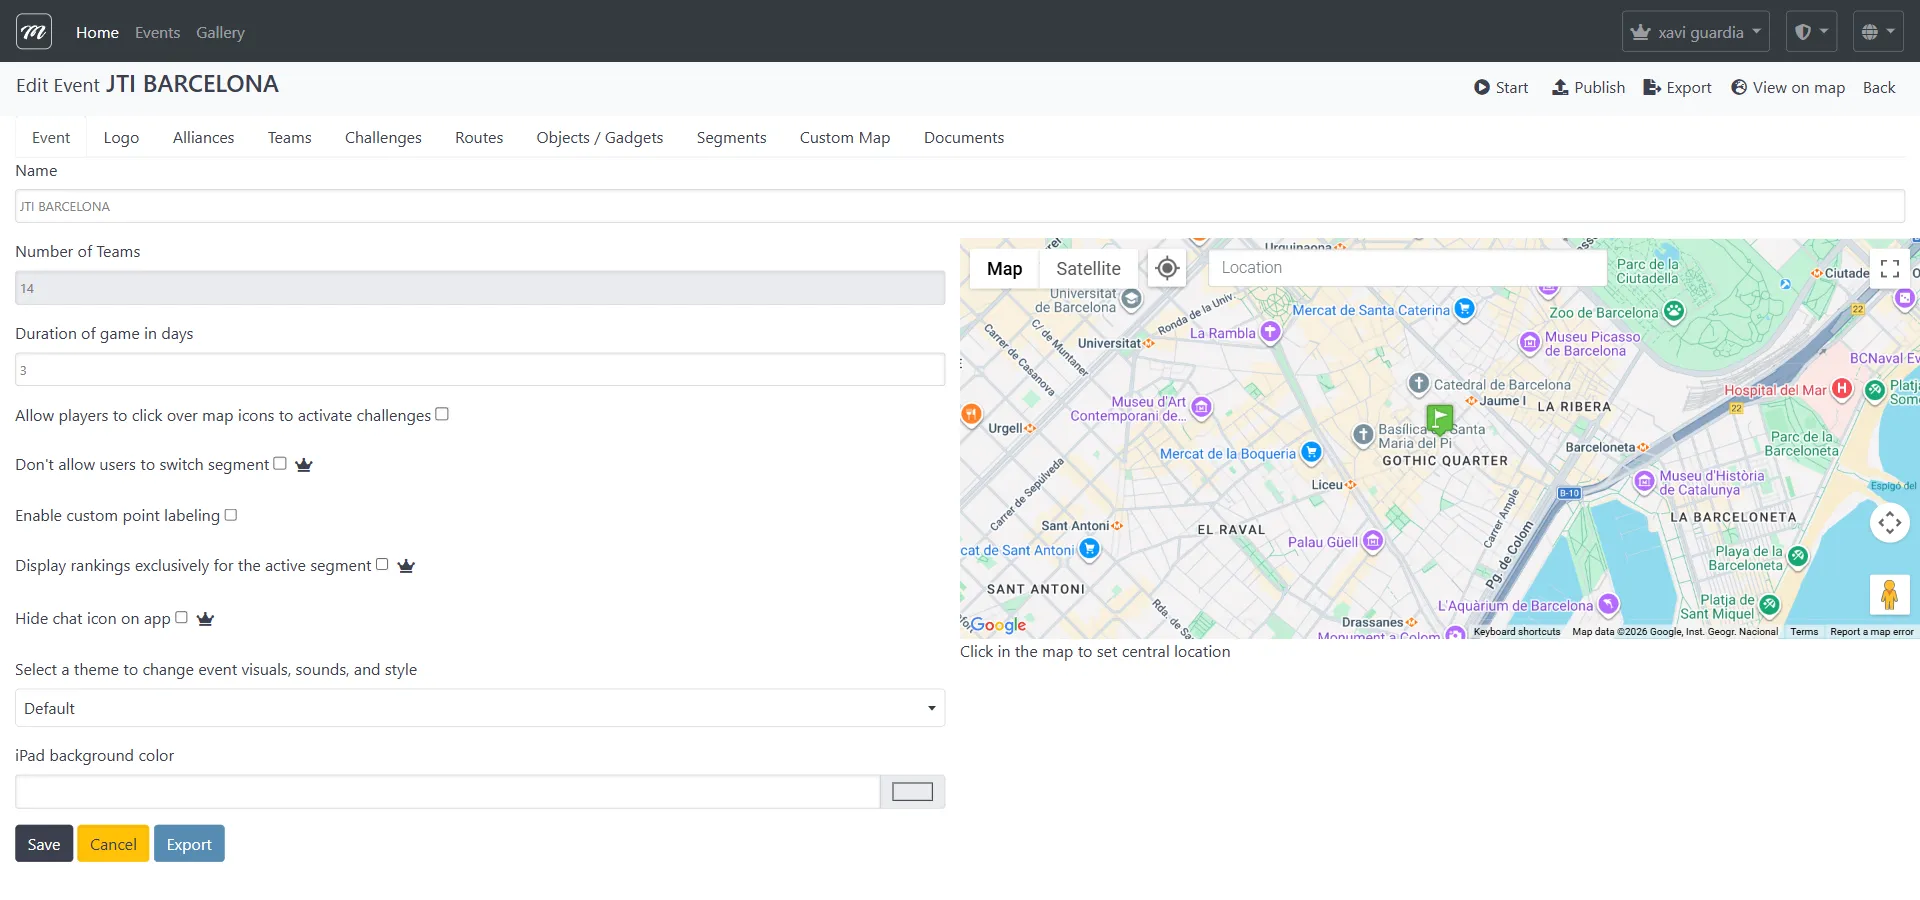
Section titled “Step 1 — Create the event”Navigate to: Events list → click New
![]()
Fill in the basic event fields:
| Field | What to enter |
|---|---|
| Name | The event display name (visible to participants) |
| Duration | Number of days the event window stays open (default: 15, minimum: 3) |
| Map location | Click the map to place a pin at the event center |
| Theme | Visual theme for the participant app |
Click Save to create the event record. You are redirected to the Event Edit page with all 10 tabs.
See: Events Overview for full field reference
Step 2 — Configure the Event tab (general data)
Section titled “Step 2 — Configure the Event tab (general data)”Tab: Event (first tab, selected by default)
Review and set the gameplay options:
| Option | Effect | Premium? |
|---|---|---|
| Allow players to click map icons to activate challenges | If off, teams must physically reach GPS locations | No |
| Don’t allow users to switch segment | Locks teams to their assigned segment | Yes |
| Enable custom point labeling | Allows custom text on challenge pins | No |
| Display rankings exclusively for the active segment | Hides the global leaderboard | Yes |
| Hide chat icon on app | Removes the in-app team chat | Yes |
Click Save after configuring.
See: Event — General Data for complete field reference
Step 3 — Upload Logo and branding (optional)
Section titled “Step 3 — Upload Logo and branding (optional)”Tab: Logo
![]()
Upload two images:
- Event logo — 512 x 512 px. Appears in the app header and event selection screen.
- Bottom-bar logo — 211 x 70 px. Appears in the app navigation bar during gameplay.
Skip this step if the default branding is acceptable.
See: Event — Logo for upload specifications
Step 4 — Create Alliances (optional)
Section titled “Step 4 — Create Alliances (optional)”Tab: Alliances

Alliances group teams into cooperative factions. Scores are averaged across alliance members so larger alliances don’t automatically win.
If needed:
- Click New
- Enter alliance name
- Save — teams are assigned to alliances in Step 5
See: Event — Alliances for alliance mechanics
Step 5 — Add Teams
Section titled “Step 5 — Add Teams”Tab: Teams
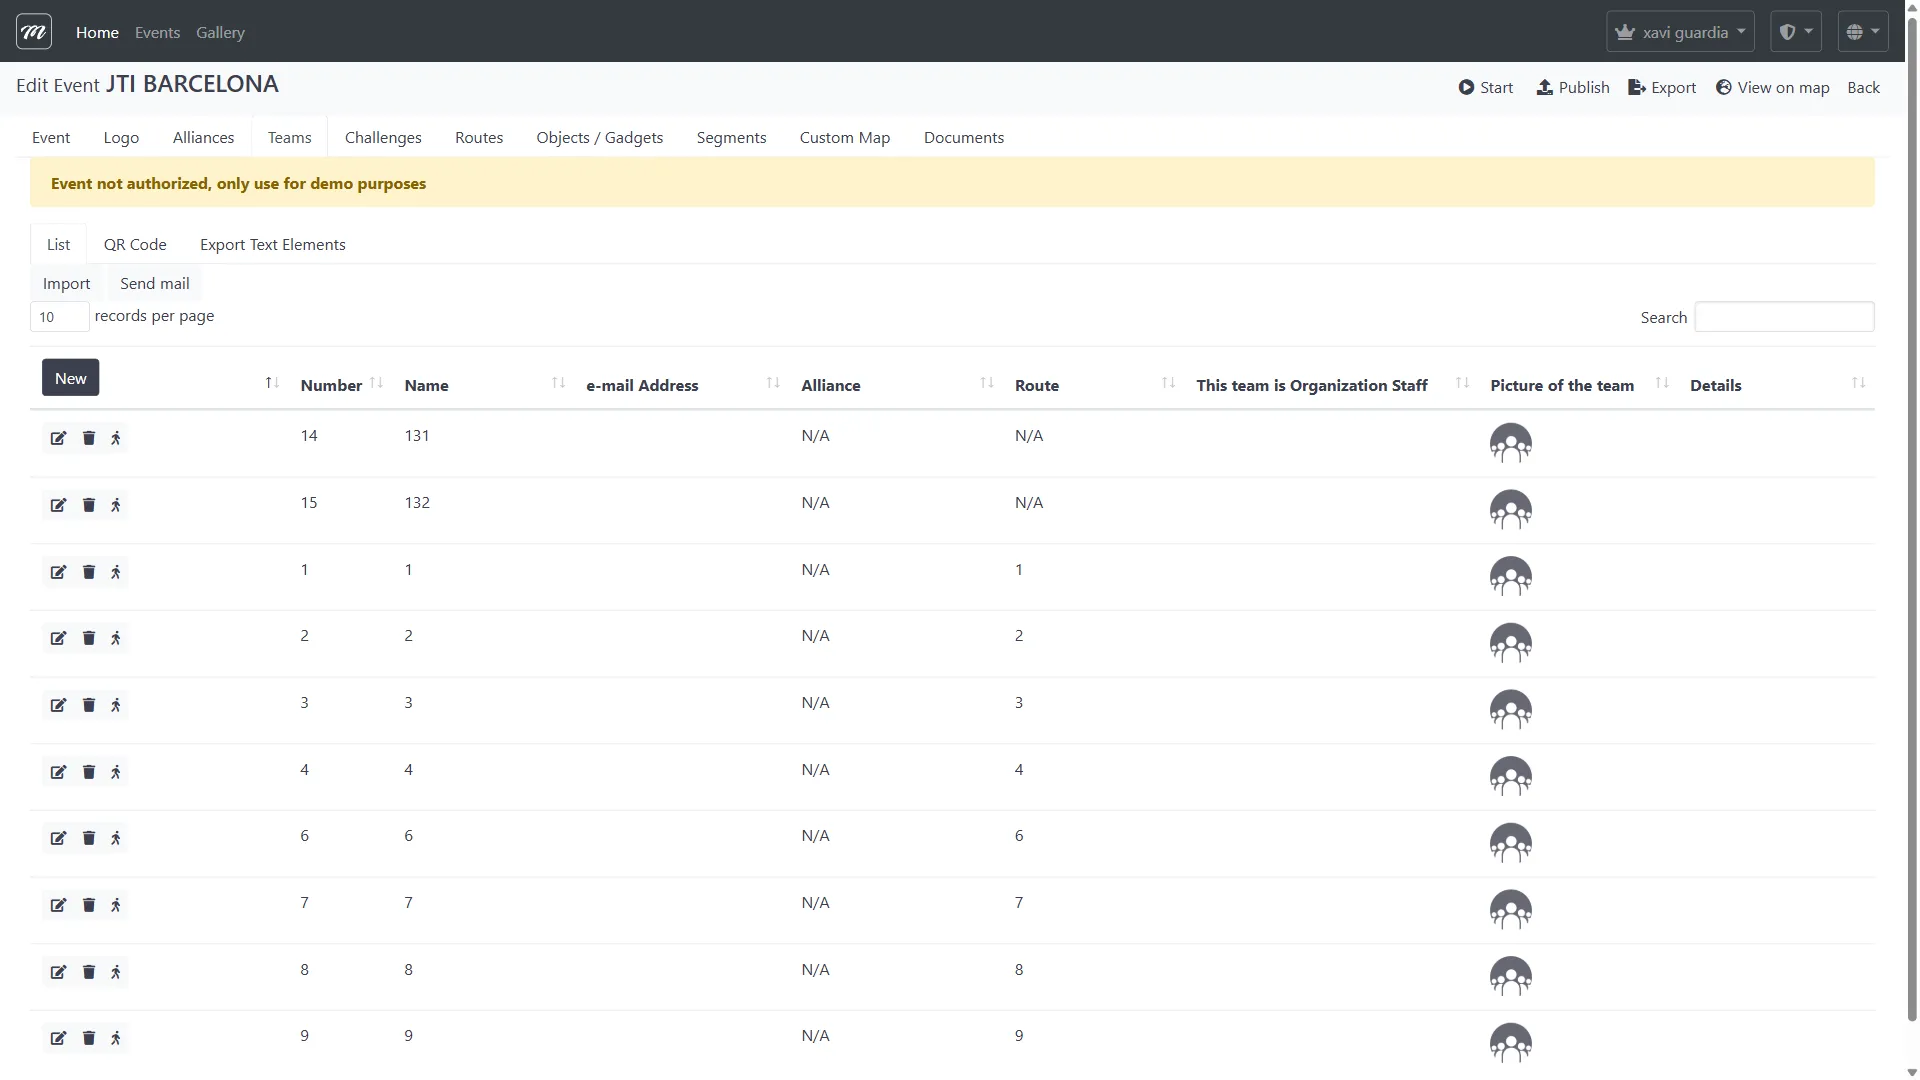
For each team:
- Click New
- Fill in: Name, Number, Route assignment (or leave empty for now), Initial Segment, Alliance
- Optionally upload a team photo and set an email for message forwarding
- Save
After creating all teams, use the QR Code sub-tab to generate activation codes, and Export Text Elements to export team data for email campaigns.

See: Event — Teams for full reference
Step 6 — Create Challenges
Section titled “Step 6 — Create Challenges”Tab: Challenges
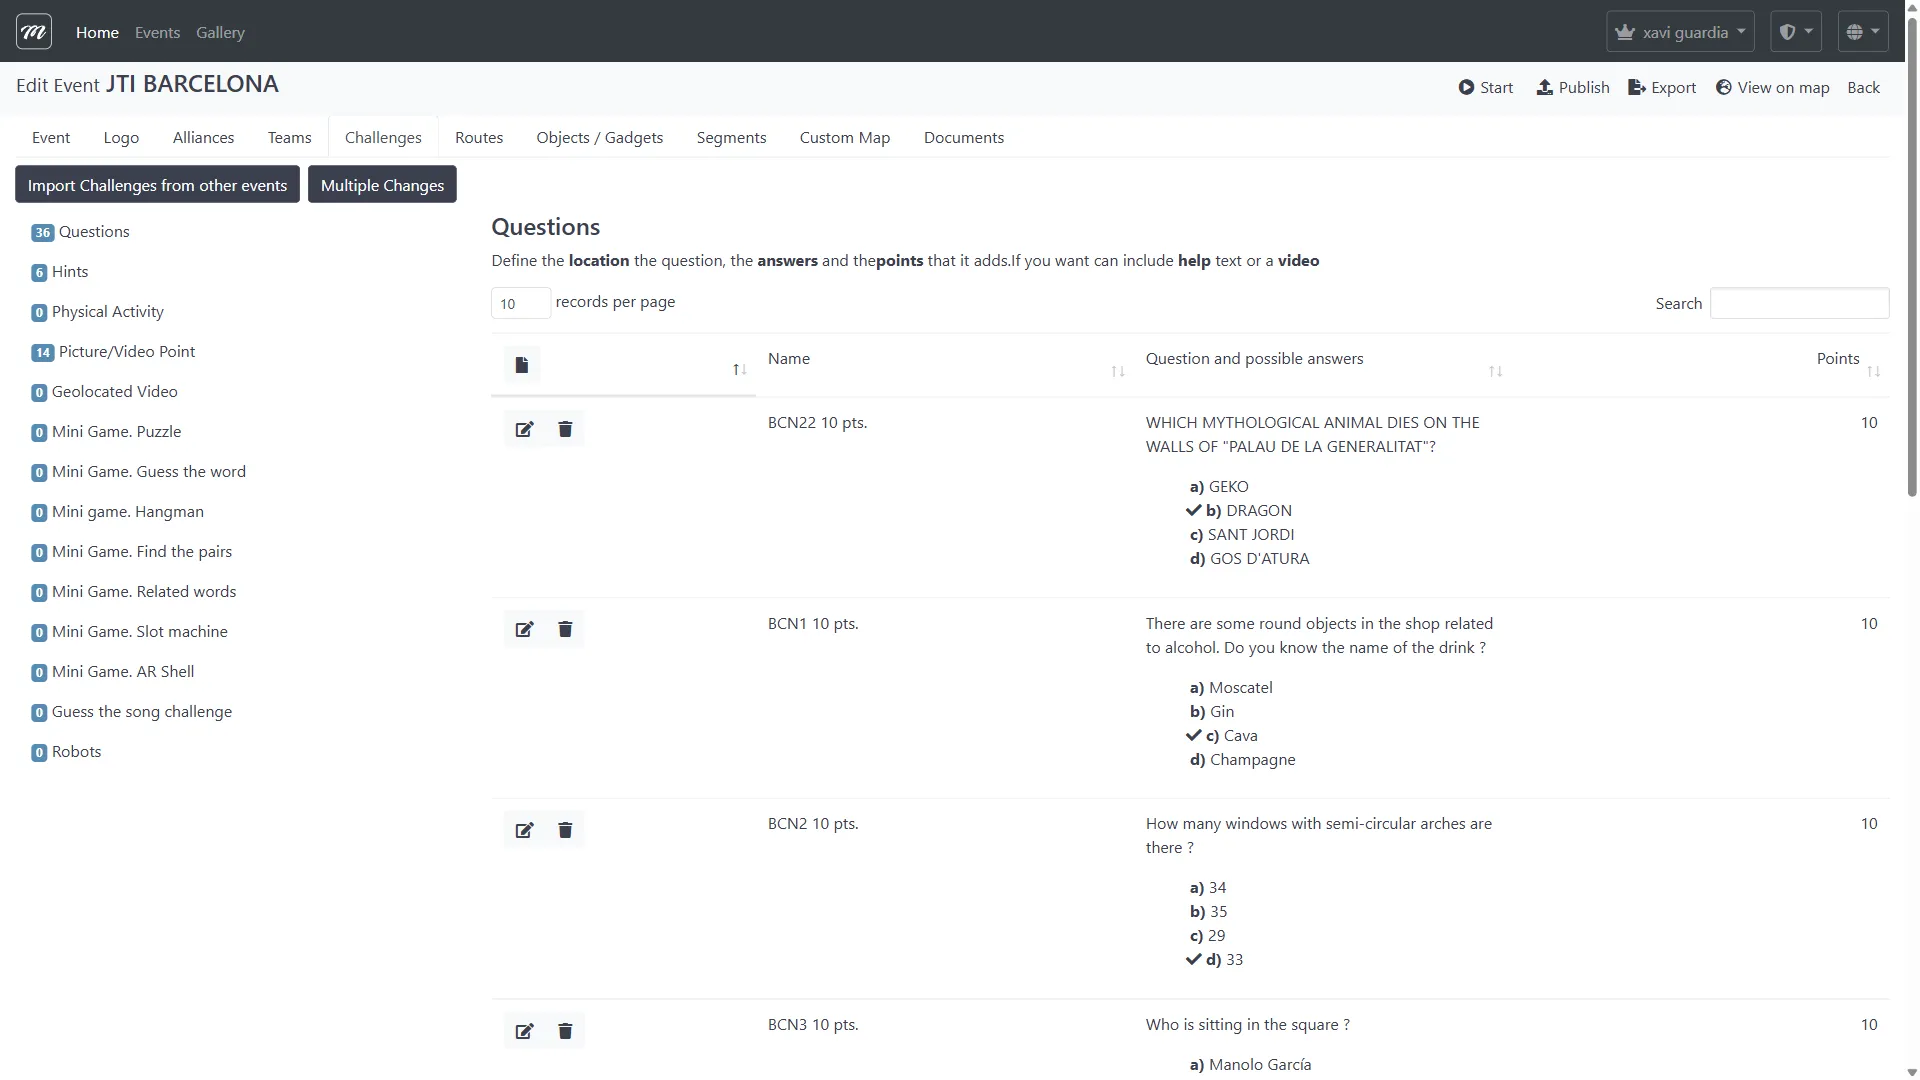
For each challenge:
- Click New
- Select the challenge type from the 14 available types (Questions, Photo, Puzzle, Hints, Prizes, etc.)
- Fill in: name, question text, points, correct answer, GPS coordinates
- For photo/video challenges: set scoring mode (auto or manual)
- Save
The left sidebar shows a count per challenge type — use it to verify your content mix.
See: Event — Challenges for type-specific field reference
Step 7 — Create Routes
Section titled “Step 7 — Create Routes”Tab: Routes
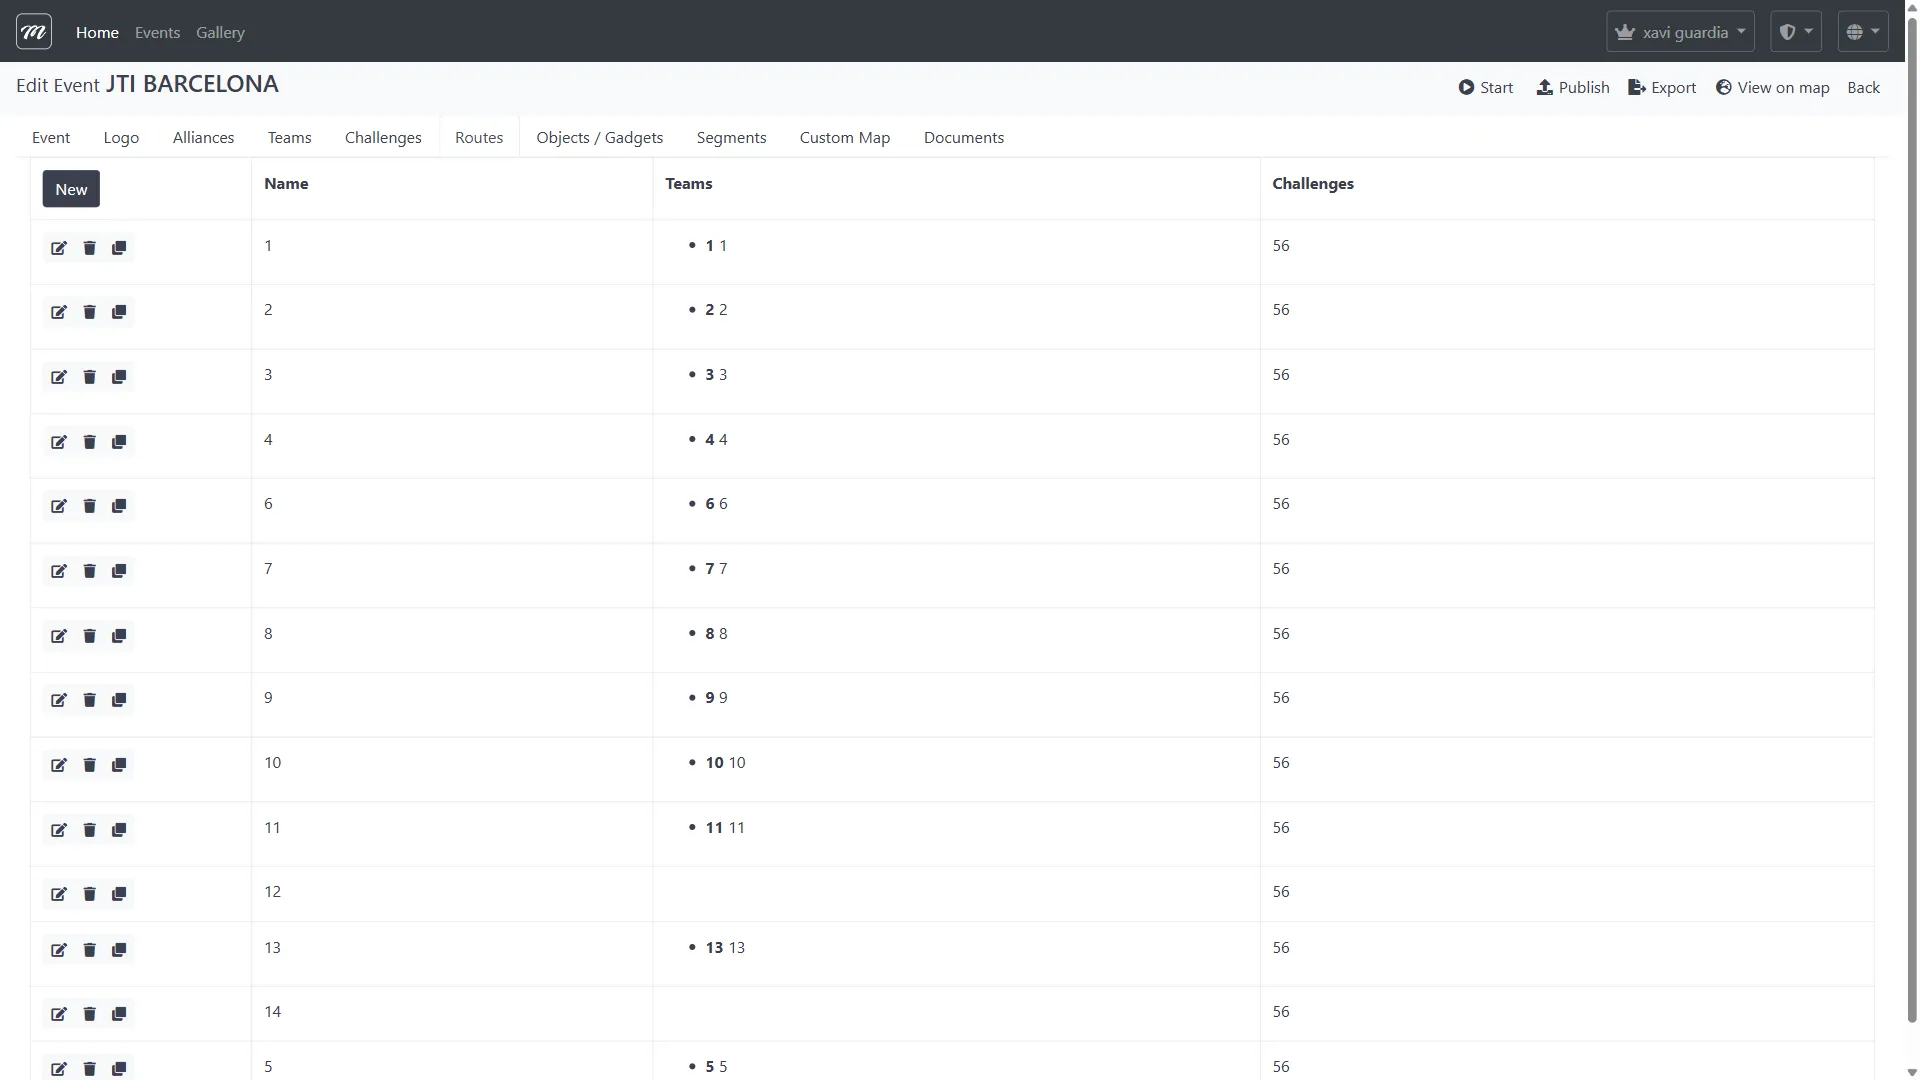
Routes define the order in which each team encounters challenges. Different routes for different teams prevent crowding at the same location.
For each route:
- Click New
- Assign challenges to the route
- Order them using drag-and-drop on the detail page, or use Sort by nearest distance for geographic proximity ordering
- Assign a team to the route
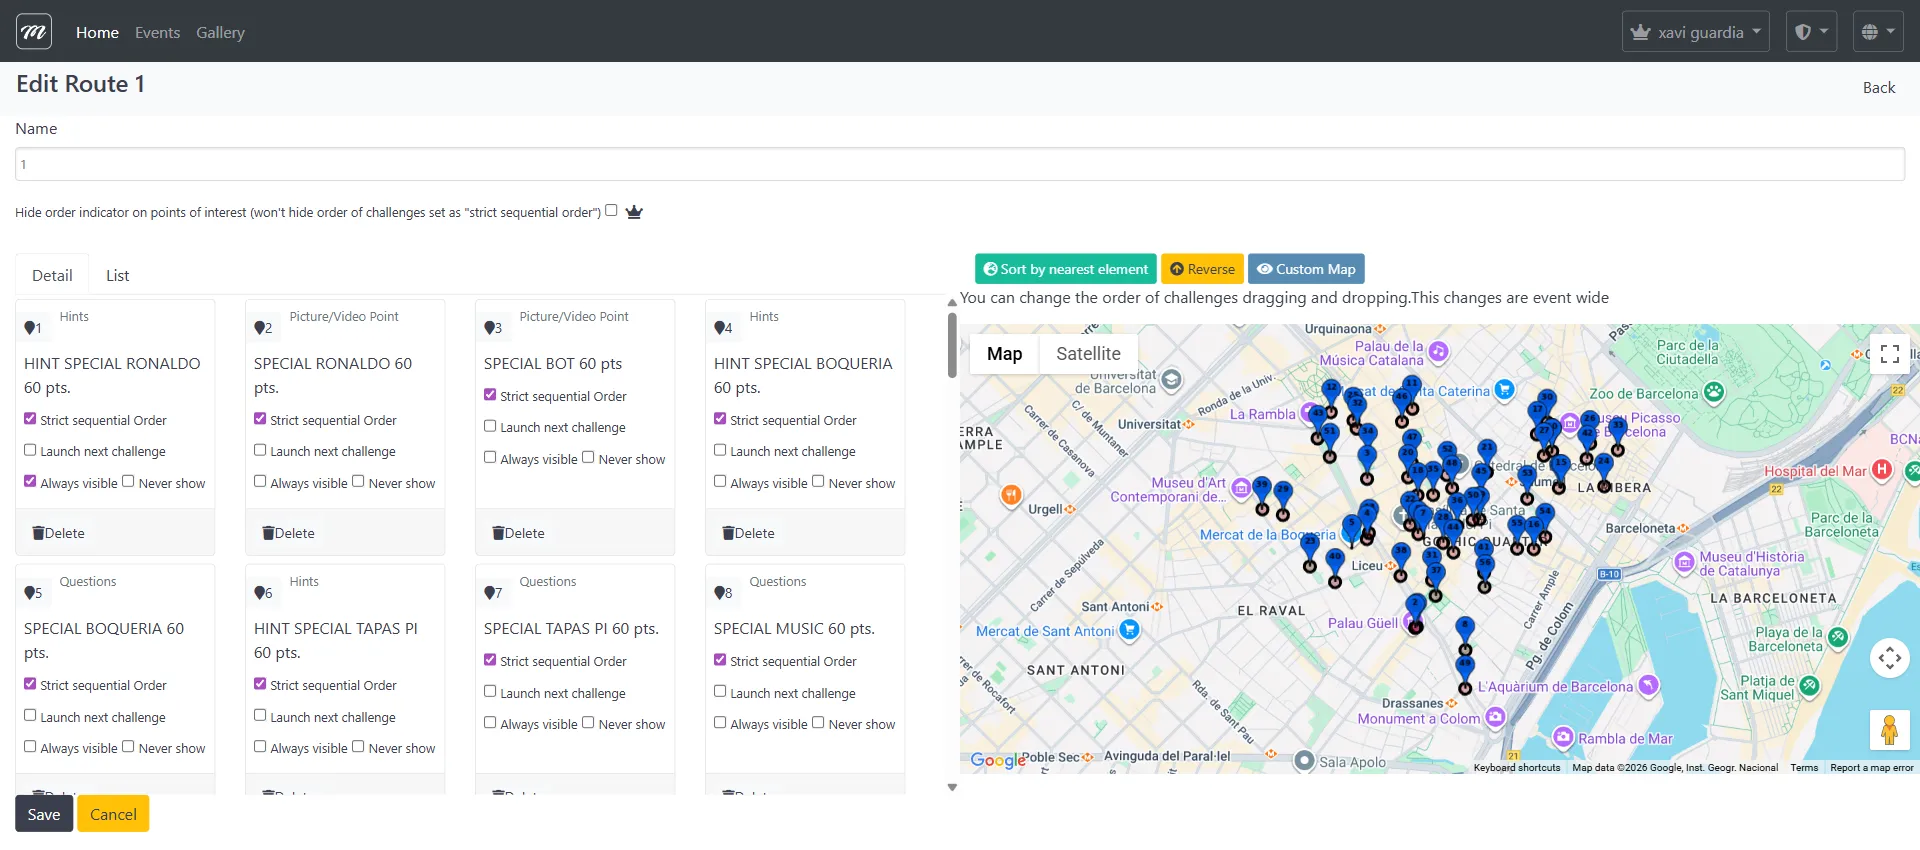
Each challenge card in the route has visibility controls:
- Always visible — challenge pin shows on the map from the start
- Never show — challenge is hidden until triggered by a previous challenge
- Launch next challenge — completing this challenge auto-activates the next one
See: Event — Routes for ordering and map sub-tabs
Step 8 — Configure Objects and Gadgets
Section titled “Step 8 — Configure Objects and Gadgets”Tab: Objects / Gadgets
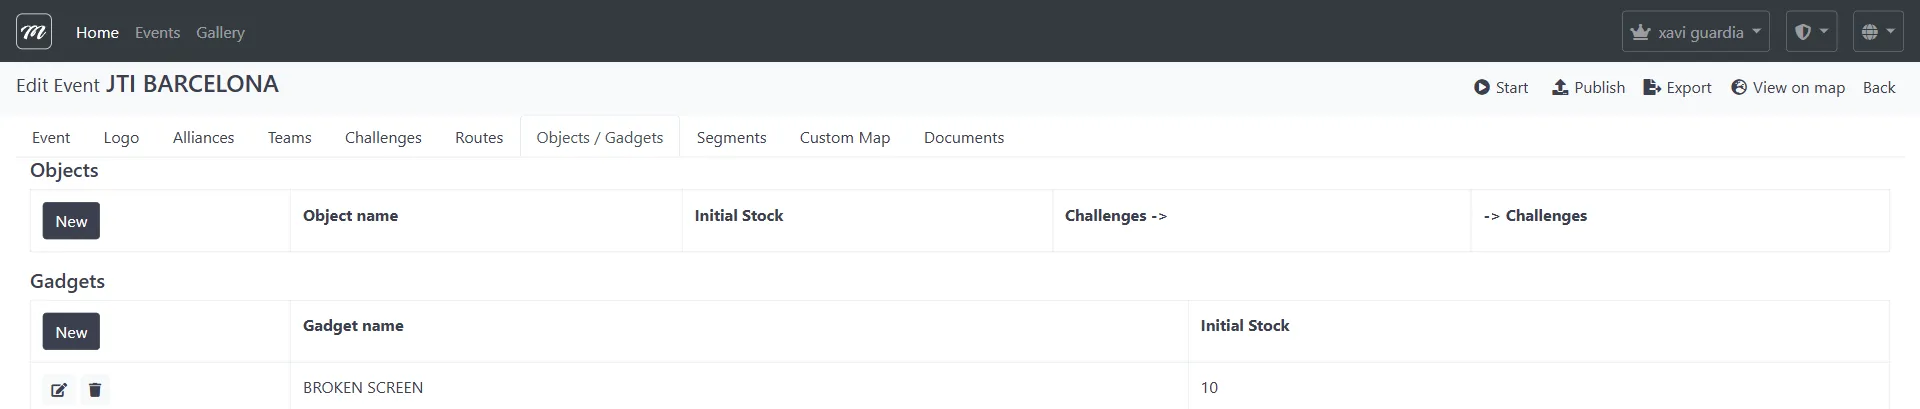
Gadgets are sabotage items teams can send to rivals during the event. For each gadget:
- Click New (in the Gadgets section)
- Select the effect type (Bomb, Drunk Screen, X-Ray, Scaring Ghost, Fart, Love, Fireworks, Broken Screen, Inverted Screen, Lock Screen)
- Set the initial stock per team (e.g., 10 uses)
- Save
Objects are collectible 3D items placed on the map. Configure them the same way if your event uses AR features.
See: Event — Objects / Gadgets for all 10 gadget effect types
Step 9 — Add Segments (optional)
Section titled “Step 9 — Add Segments (optional)”Tab: Segments

Segments divide the event into phases. Teams progress to the next segment when they complete enough challenges in the current one.
If needed:
- Click New
- Set segment name, order, and unlock conditions
- Assign challenges to each segment
See: Event — Segments for dynamic segment mechanics
Step 10 — Upload a Custom Map (optional)
Section titled “Step 10 — Upload a Custom Map (optional)”Tab: Custom Map
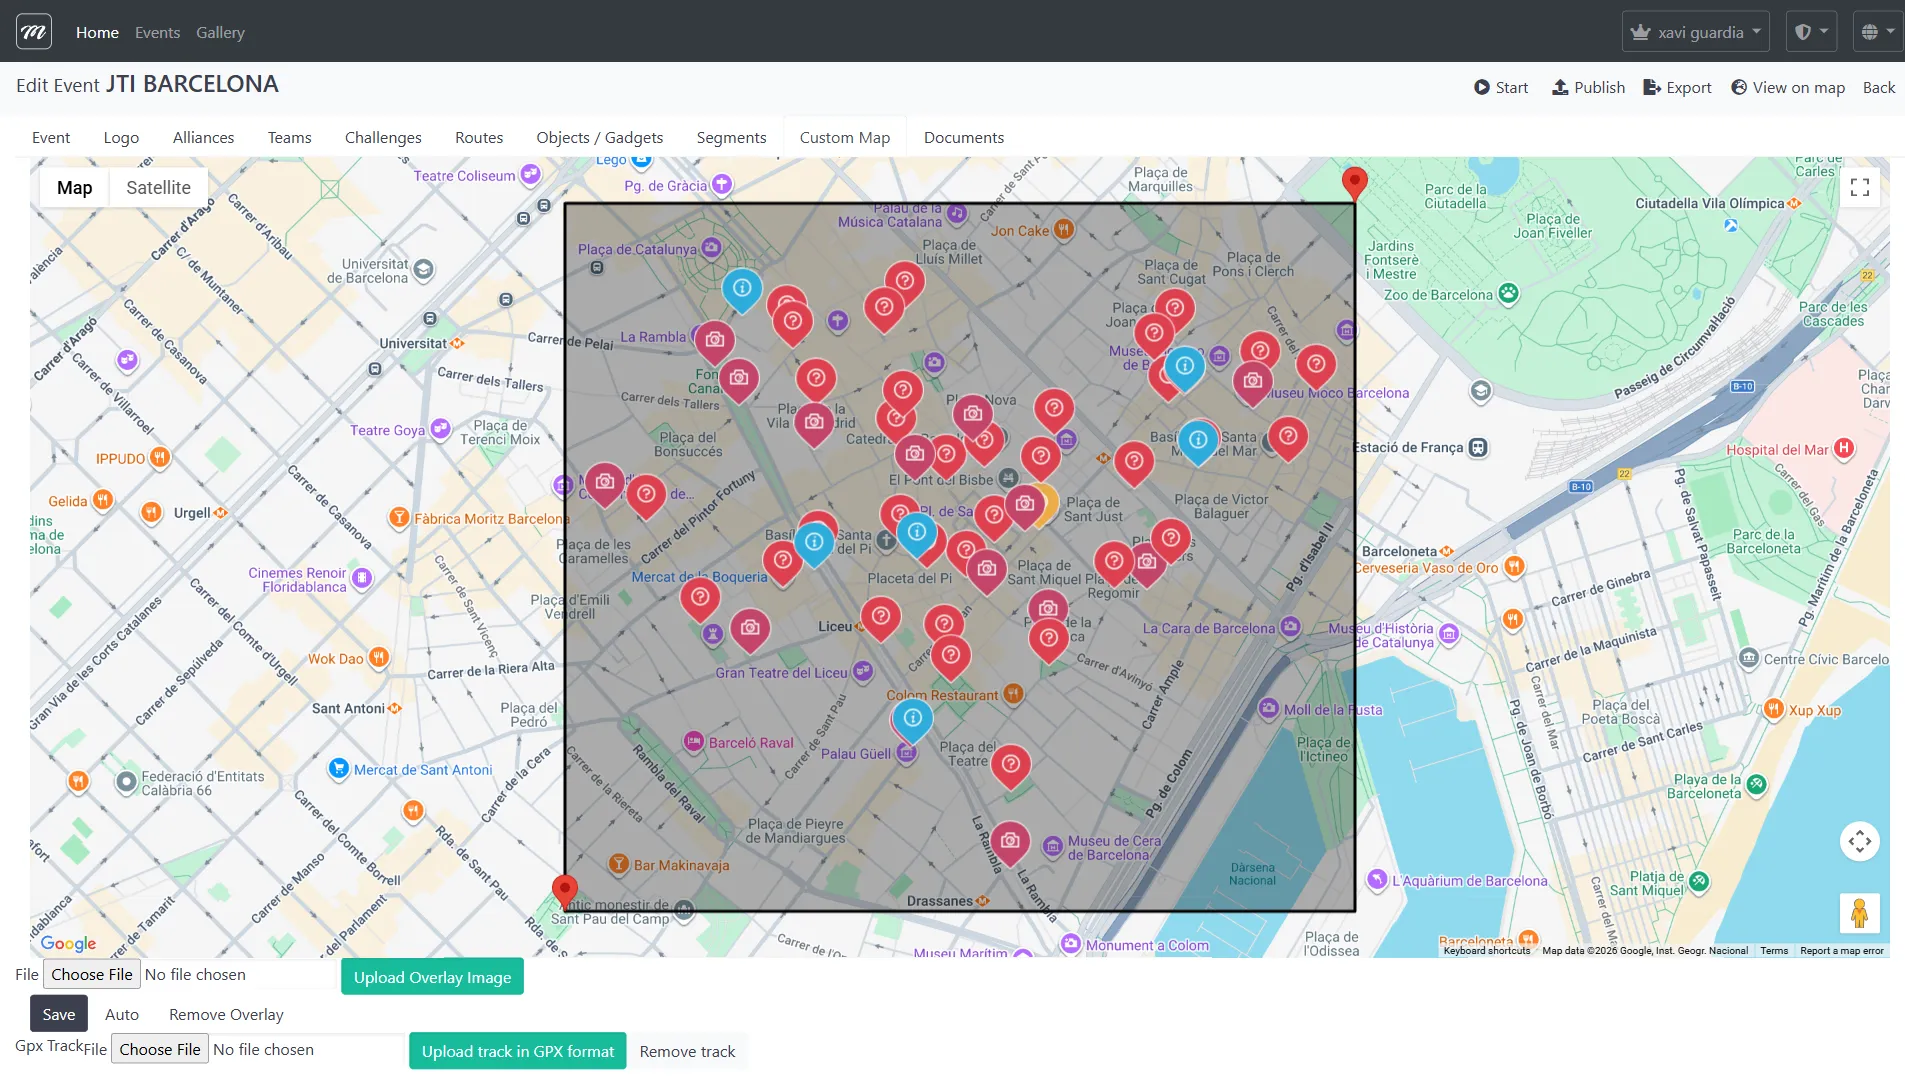
Replace the standard Google Maps appearance with a branded overlay:
- Click File to select an overlay image
- Click Upload Overlay Image to apply
- Optionally upload a GPX track file to show a recommended walking route
The overlay creates a more engaging and branded experience in the participant app.
See: Event — Custom Map for overlay and GPX configuration
Step 11 — Attach Documents (optional)
Section titled “Step 11 — Attach Documents (optional)”Tab: Documents

Upload supporting files in three sections:
- Teams — Documents downloadable by participants (rules, maps, instructions)
- Staff — Documents for event organizers only
- AR Package — Metaio AR content bundle (legacy format)
See: Event — Documents for file management
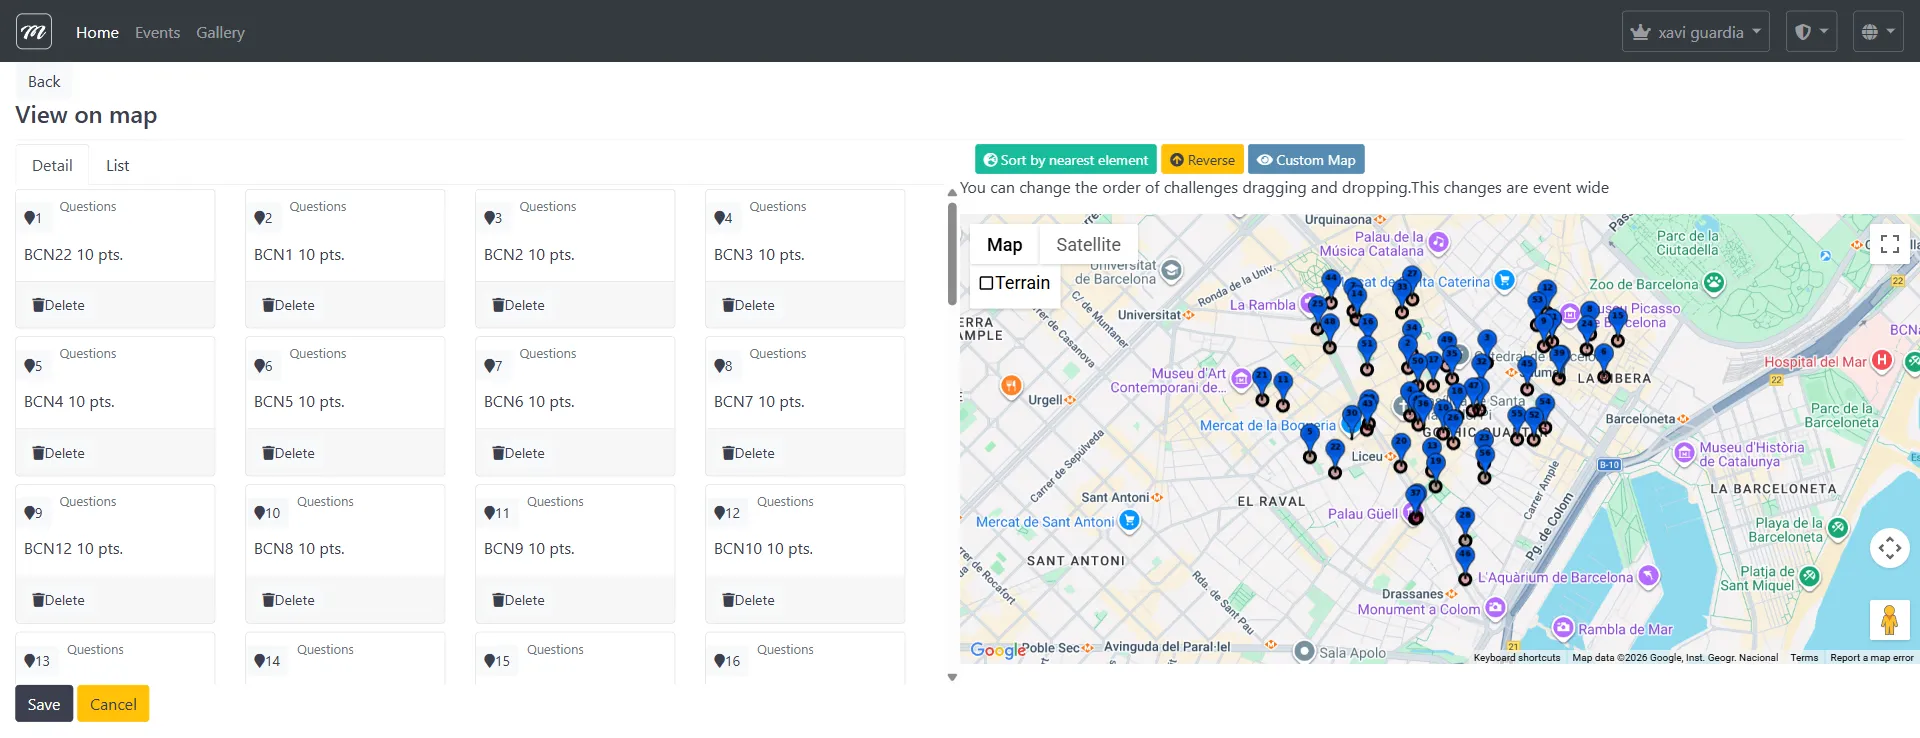
Step 12 — Verify the setup
Section titled “Step 12 — Verify the setup”Before starting the event, review:
| Check | Where to look |
|---|---|
| All teams created and assigned to routes | Teams tab — every team has a route |
| All challenges have GPS coordinates | Routes tab → map view — all pins are placed |
| Challenge ordering makes geographic sense | Routes tab → Sort by nearest distance |
| Gadget stock is appropriate | Objects/Gadgets tab — verify stock per team |
| Segments configured correctly (if used) | Segments tab — correct unlock conditions |
| Custom map aligned (if used) | Custom Map tab — overlay matches challenge locations |
| Logo uploaded (if branded) | Logo tab — both images visible |
Use the View on map action from the event edit action bar to see all challenges plotted on the map.
Related flows
Section titled “Related flows”- Flow 2 — Start Event and Track — What to do after configuration is complete
- Flow 3 — Event Execution — What happens during the live event